Load Speakup Article Player through Google Ad Manager
This guide walks you through delivering the Speakup Article player via Google Ad Manager (GAM).
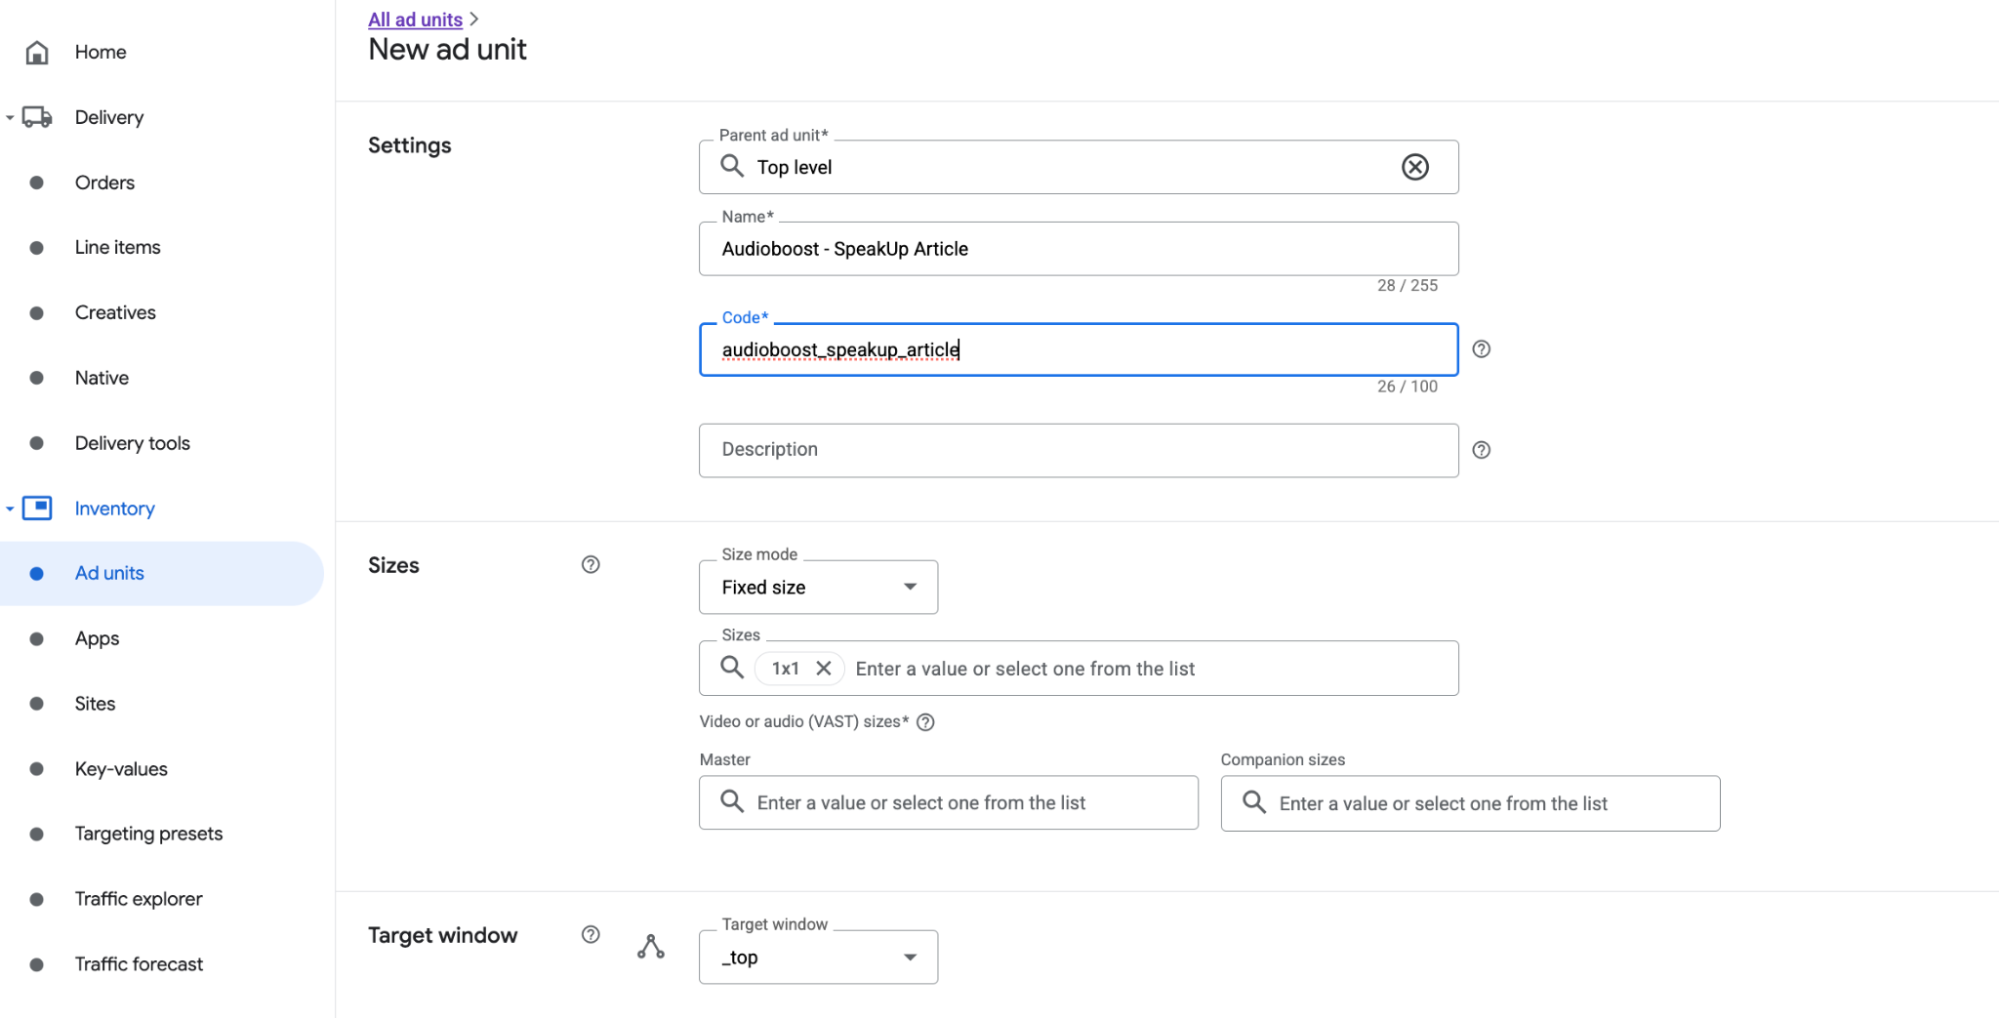
Step 1: Create new Ad Unit
Create a new ad unit from Inventory > Ad units section. Choose "Fixed size" and "1x1" in Sizes.
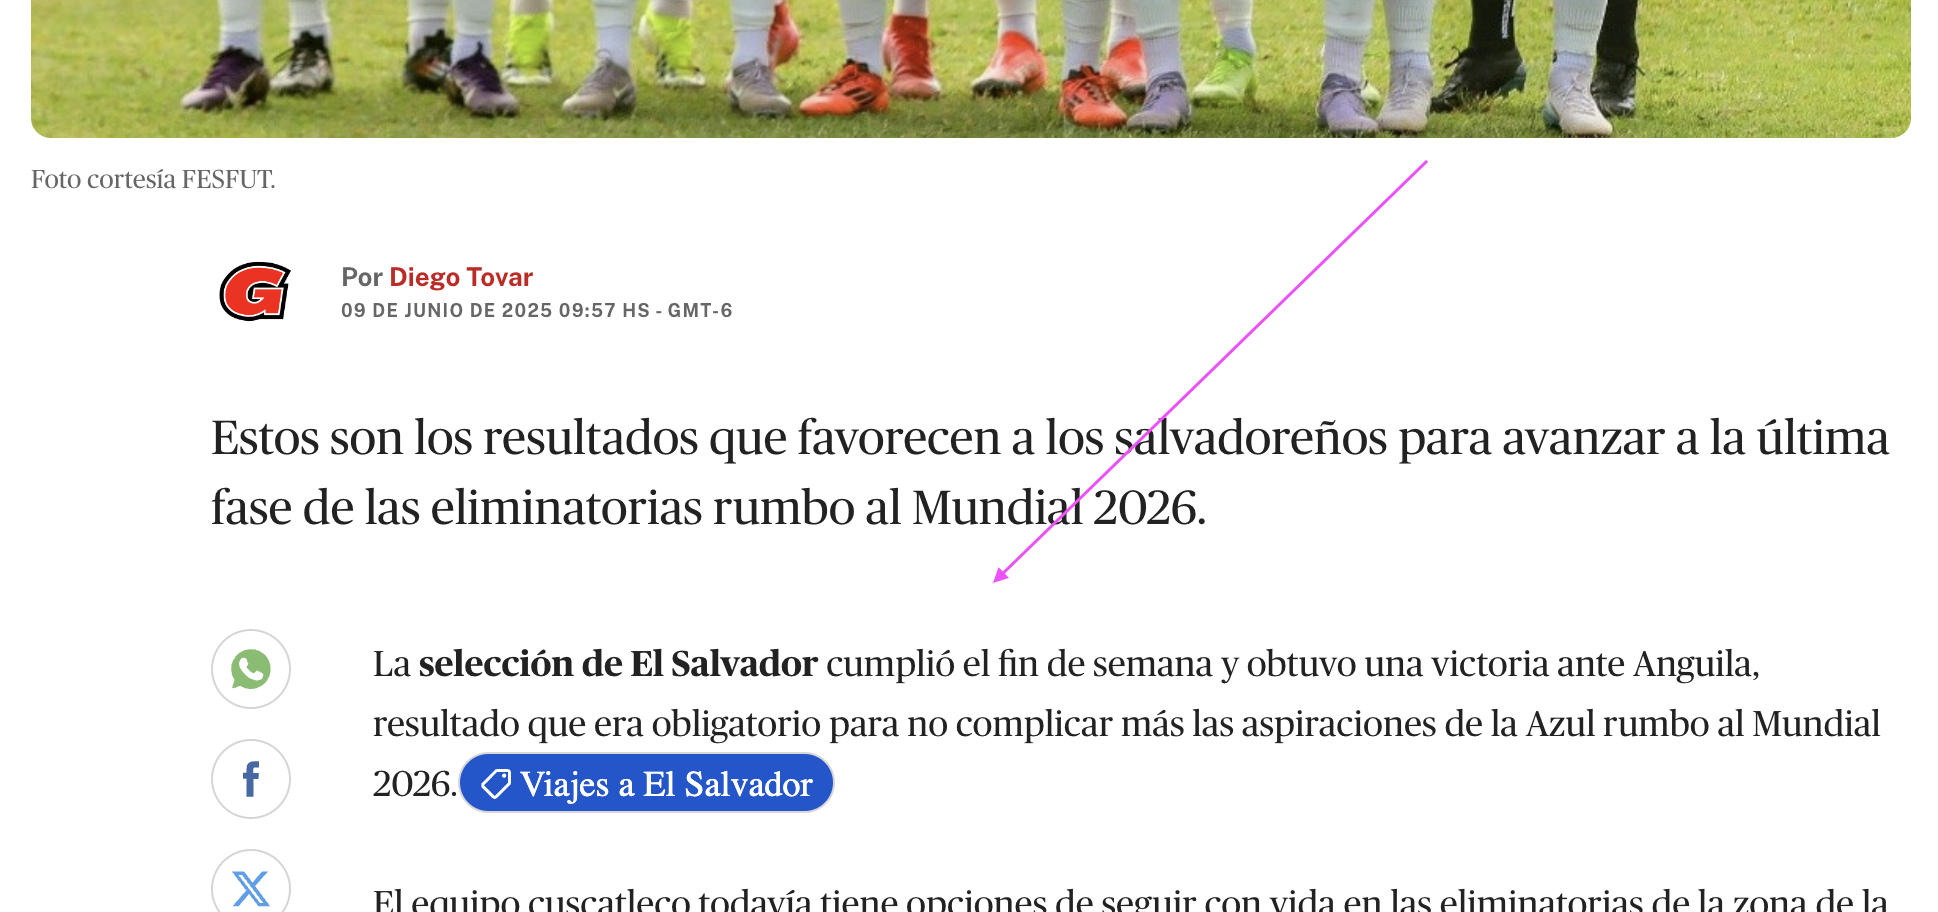
This Ad Unit must only deliver the Speakup Article player. Its container div must be placed between the title and the beginning of the body article.
Positioning example:
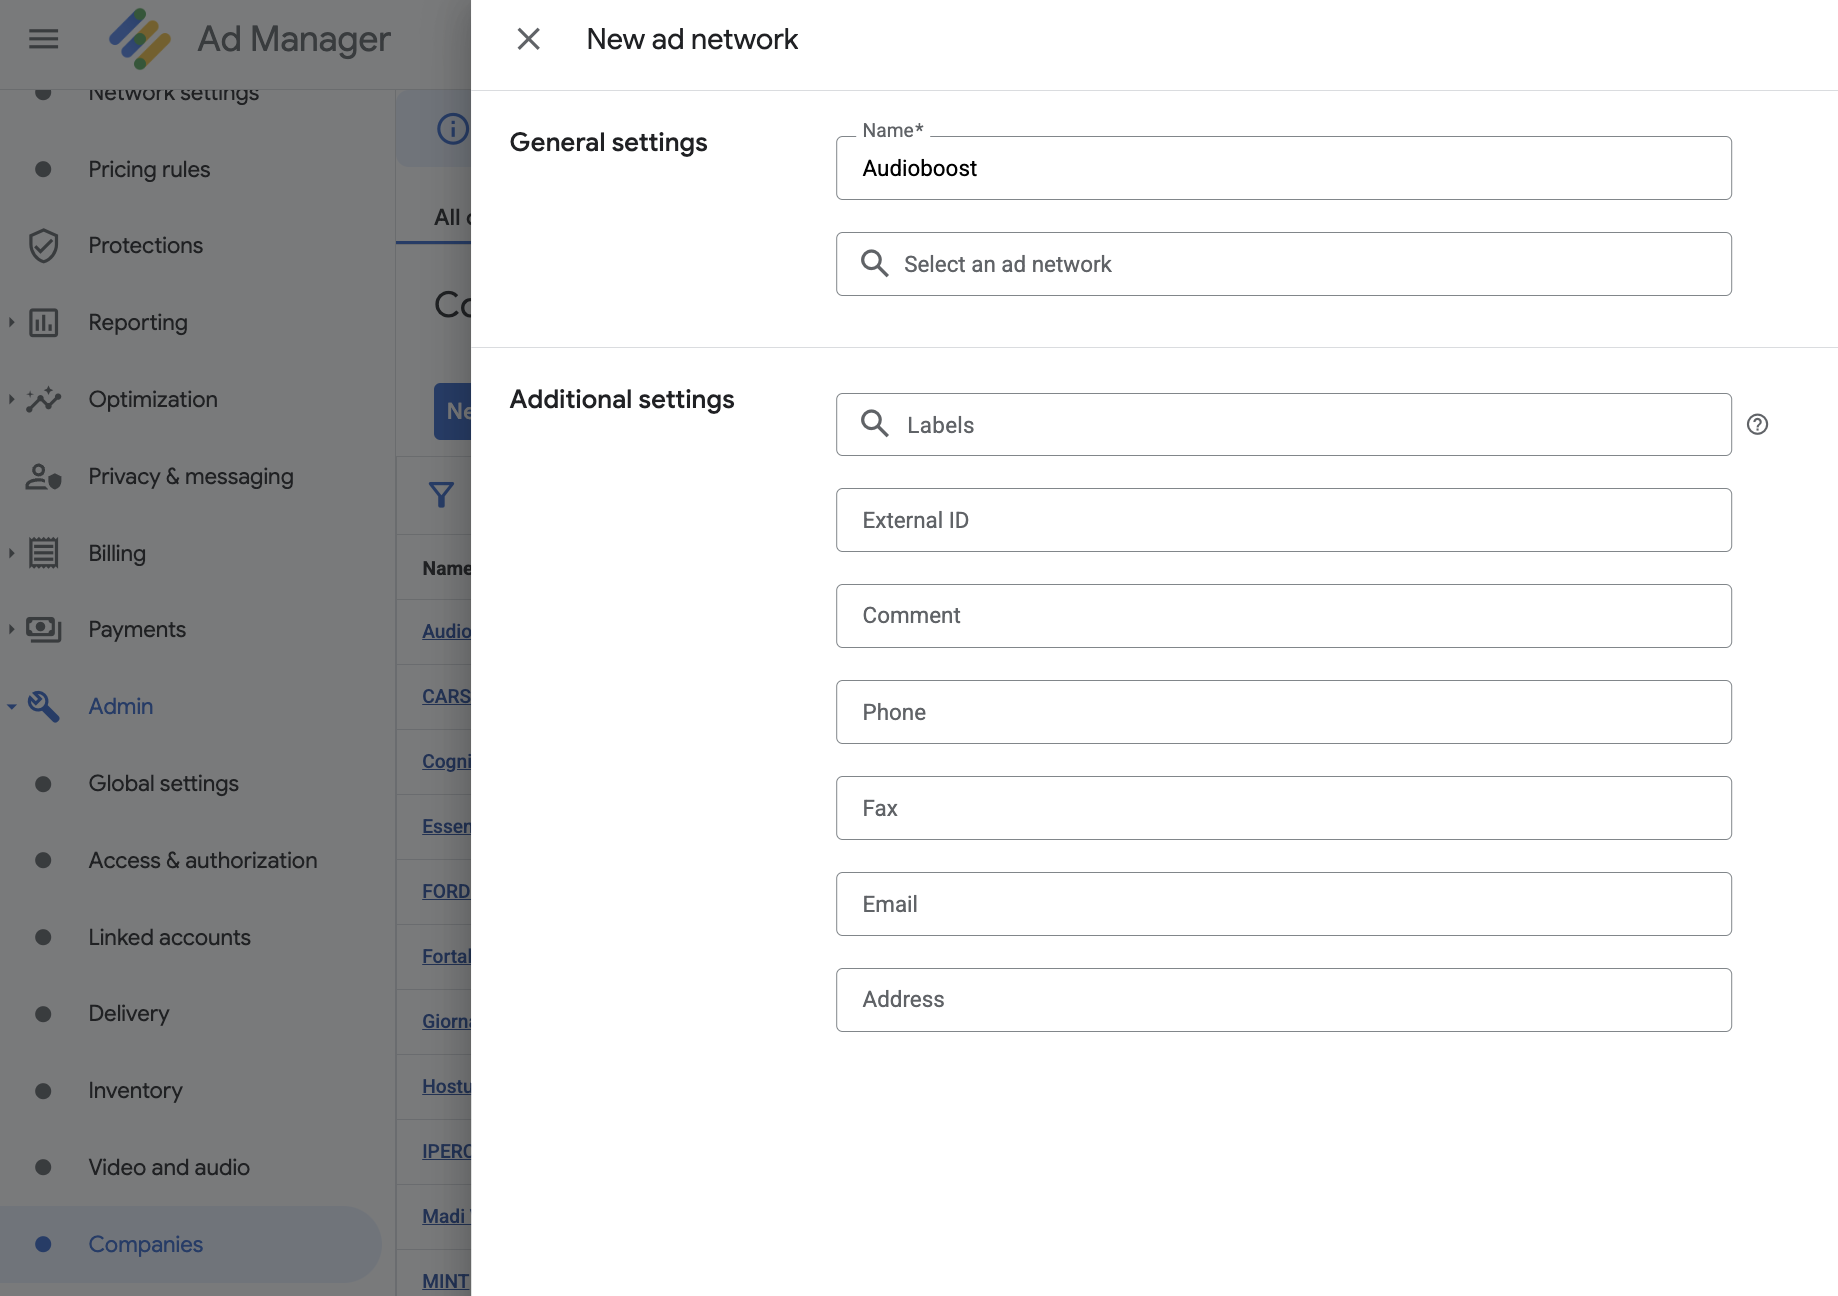
Step 2: Create new Ad Network
Create a new Ad Network item for Audioboost from the Admin > Companies section.
Step 3: Create new Order
Create a new Order "Audioboost" by Delivery > Order, and approve this Order before using.
Step 4: Create new Line Item
Create a new Line Item under Audioboost Order with these settings:
| Setting | Value |
|---|---|
| Ad type | Display |
| Line item type | Sponsorship (4) — ensures the player is always shown |
| Expected creative size | 1x1 |
| Start Time | Immediately |
| End time | Unlimited |
| Goal | 100% of total impressions |
| Rate | $0 USD (or any conventional value) |
Add targeting:
- Inventory: Select the Ad Unit with the 1x1 size (from Step 1)
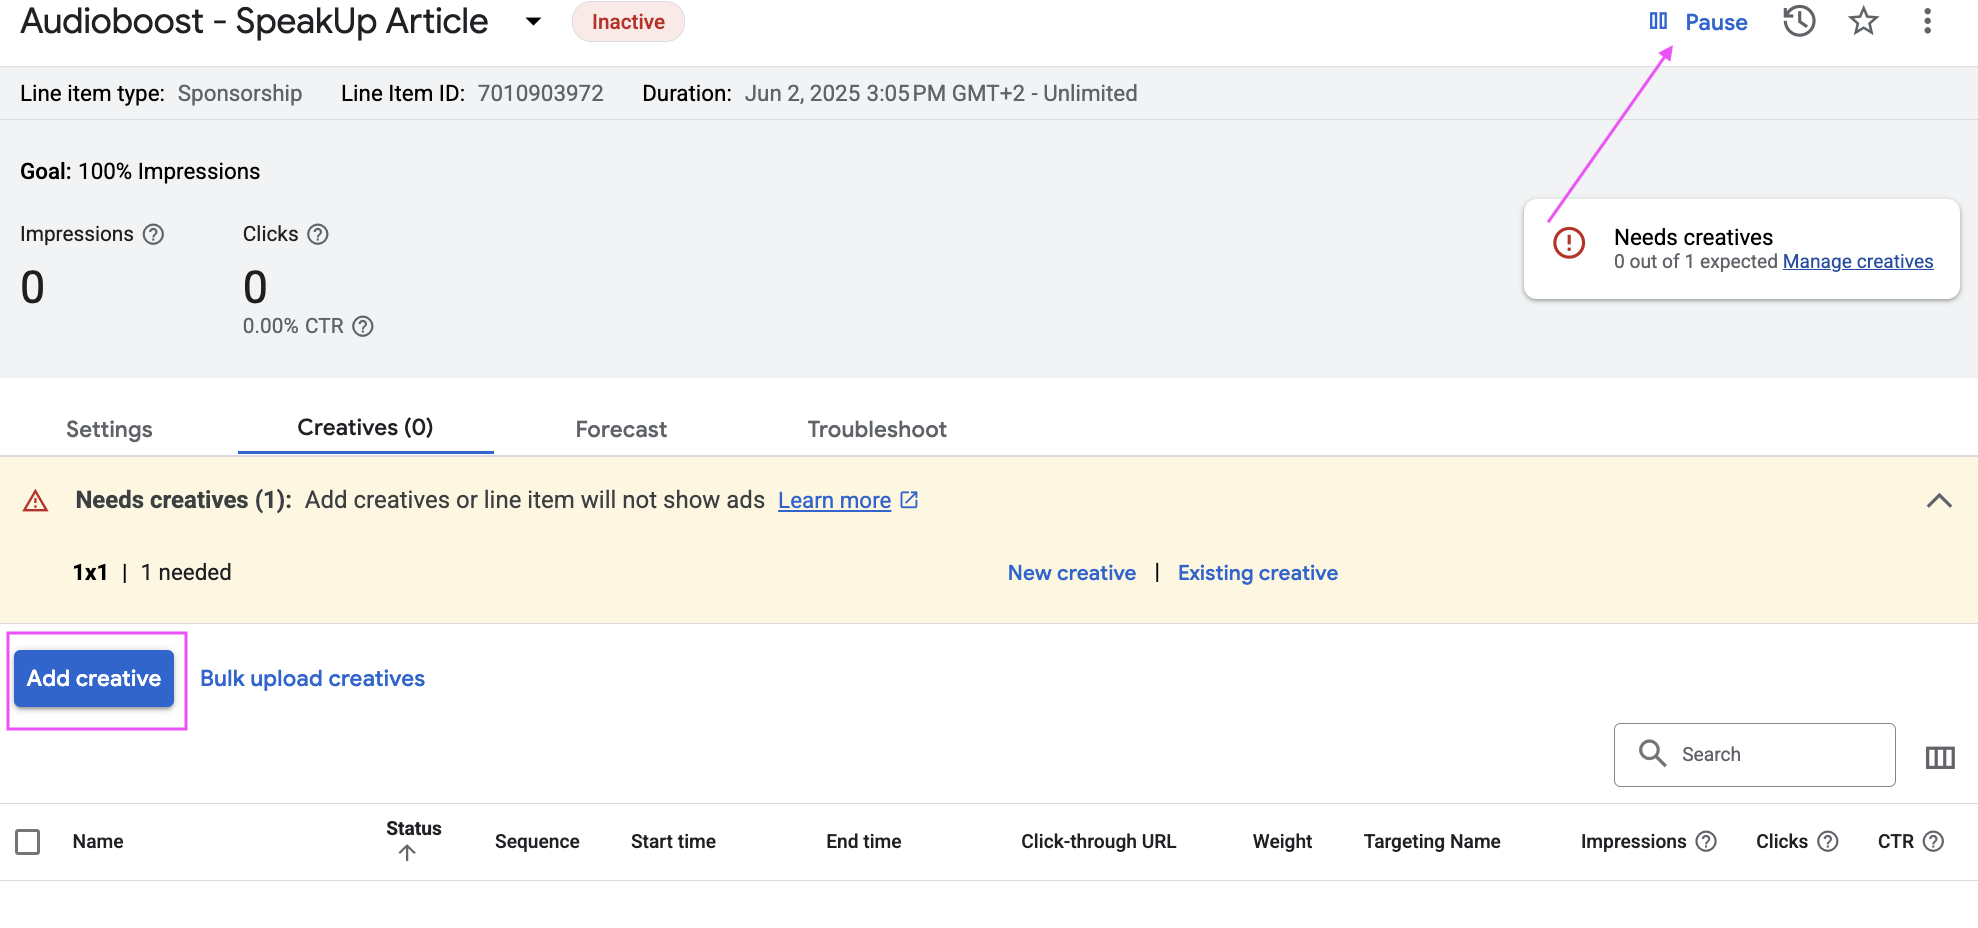
Step 5: Pause Line Item and Create Creative
Please pause the line item before finishing all the testing steps.
- Create new Creative under the Line Item from step 4
- Click on
"Add creative"and select"New creative" > "1x1"
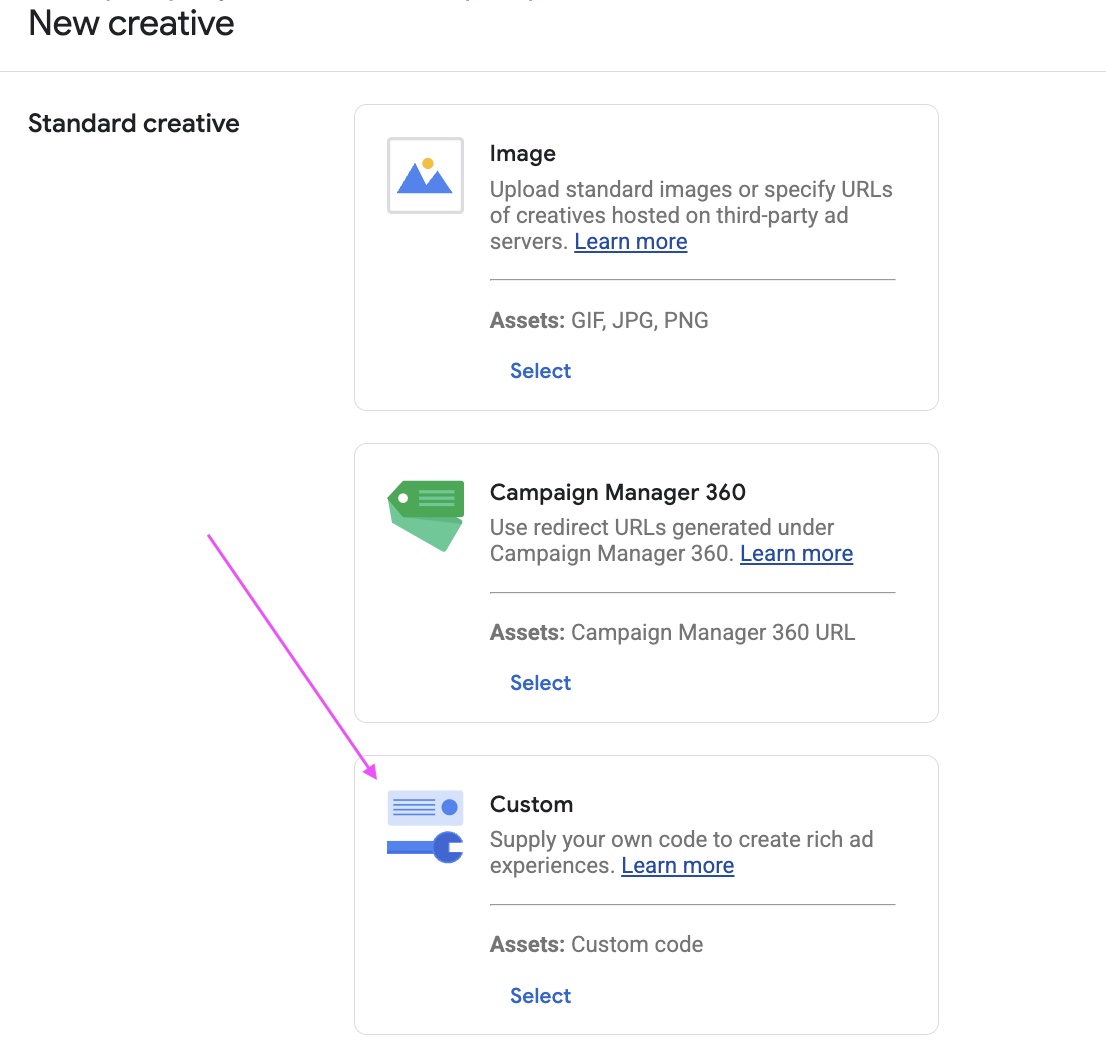
- Choose "Custom" in "New creative" page
- Configure the creative:
- Insert the creative's name (e.g., "SpeakUp Player - 1x1")
- Choose code type
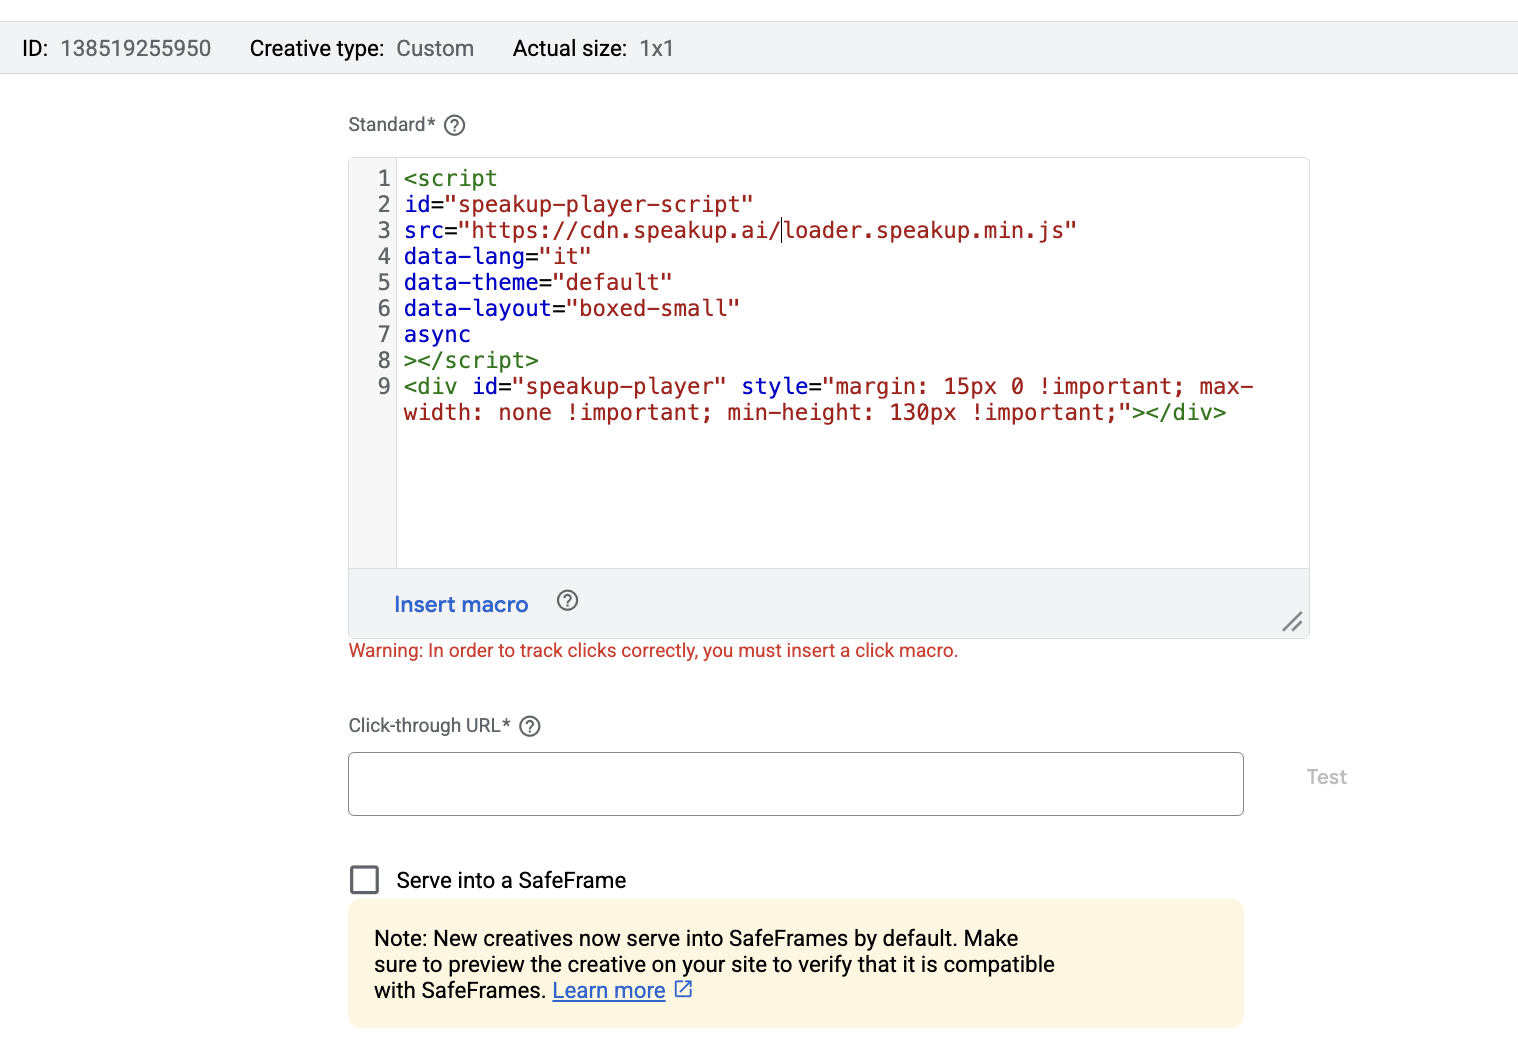
"Standard" - Copy and paste the script below into the Standard text area:
<script
	id="speakup-player-script"
	src="https://cdn.speakup.ai/loader.speakup.min.js"
	data-lang="it"
	data-theme="default"
	data-layout="boxed-small"
	data-site="your-site-id"
	async
></script>
<div
	id="speakup-player"
	style="margin: 15px 0 !important; max-width: none !important; min-height: 130px !important;"
></div>
The player can be customized using the options available in the Customization Options section.
- Important: Make sure the checkbox
"Serve into a SafeFrame"is disabled
Step 6: Preview
Create a preview page for verification:
- Click Preview
- Choose: On Site
- Paste the live page URL that has the correct 1x1 Ad Unit in it
- Choose: Show preview URL
- Copy the URL and send it to us for checking
Step 7: Go Live!
Go back to the line item and click "Resume" once your Audioboost Publisher Manager confirms everything is ready.
Need Help?
If you have any doubts, do not hesitate to contact us at support@audioboost.com.